Recent Work and Projects
Bio-Inspired Design
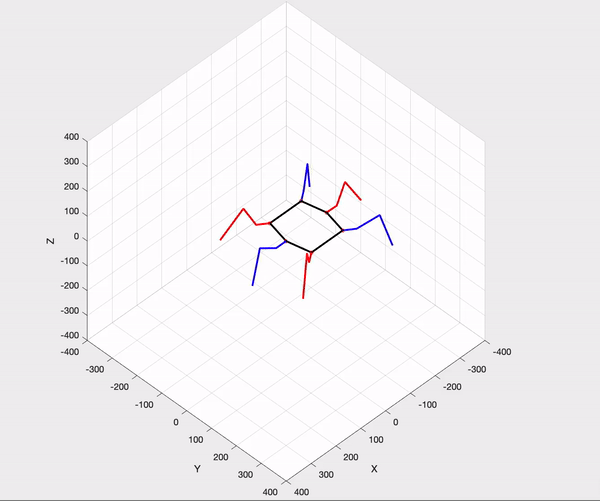
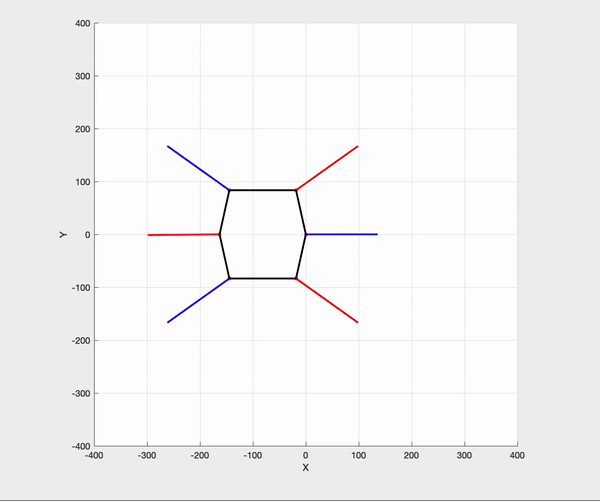
Hexapod Robot Kinematics


For my Bio-Inspired Design Class, one of our larger projects involved developing walking gaits for a 3D printed hexapod robot. For this project, the robot was already made and assembled, in fact, the part files are available at this public website here! The project task was to design the kinematics for the hexapod servos to produce (1) a linear translation motion and a (2) zero-point rotation motion by choosing a walking gait based on hexapod animals. Our group decided to use a Tripod gait in which 2 sets of 3 legs move together to produce motion. For this project, I was able to repurpose some of my Matlab code from my Introduction to Robotics class to solve for the forward and inverse kinematics. In the end, our rotational motion was very successful, with no measurable deviation from the center position. Our translational motion was not as successful, and the hexapod veered off to the side as it walked forward, however this was attributed to a malfunction in one of the servos which caused errors for every team's kinematics during testing day.
Isometric View
Overhead 2-D View
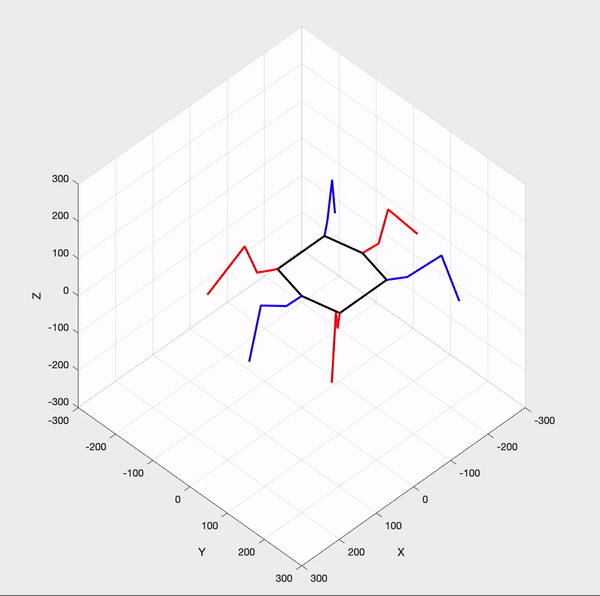
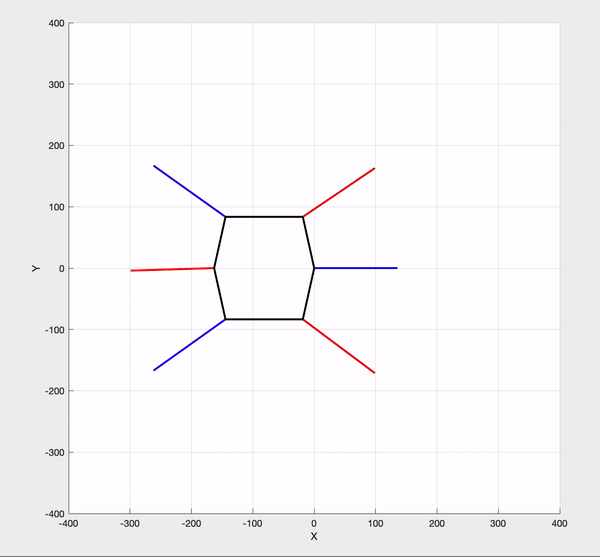
Rotation
Translation
Mechatronics
Search and Rescue RC Car Design


Over the course of my spring 2023 semester, I worked with 2 other mechanical engineering students to design and prototype 2 autonomous vehicles as a part of our mechatronics class. The objective of the project was to program the 2 vehicles to simultaneously search the environment and cooperatively carry a target object out of the environment as shown in the diagram. Our final prototype involved the following features:
-
QTI sensors to distinguish single, double and out of bounds lines
-
2 way radio communication via wireless RF Transceiver modules
-
Ultrasonic radar for near obstacle detection
-
Antenna module for 15+ meter communication range
-
4 omnidirectional wheels for increased movement options
-
3D printed IR receiver fixture with baffling for reduced noise
-
3D printed rack and pinion "forklift" system for picking up obstacles
Intermediate Heat Transfer
Additive Manufacturing Heat Sink Design


In my Intermediate Heat Transfer class I designed, analyzed, manufactured and tested an additively manufactured heat sink that simultaneously cools 2 constant heat flux power electronics modules subjected to forced convection. I worked on this project with a team with 4 other students and our final design was used finned airfoils in order to promote aerodynamic flow through the fins but maximize the available surface area for the cool air to convect heat away from the heater. Parts were 3D printed in stainless steel using a unique FDM process in which parts are printed first as a "green part" and then the binding is removed and the stainless steel is sintered. When tested in reality, temperature was measured at various power levels and for various periods of time to infer the cooling efficiency of the design. After 10 minutes at full power, the 20 W heater stabilized at 89.3 ˚C and the 35 W heater stabilized at 160.2 ˚C.
The design report can be viewed below:
Senior Design Project sponsored by DowAksa
Reverse Engineered Forge Carbon Fiber Drone Propeller
In the Fall of 2023 I worked with a team of 3 other senior mechanical engineers at the University of Delaware to reverse engineer drone propellers out of a forged carbon fiber material provided by DowAksa. We first began by 3D scanning an existing propeller (see figure for comparison) in order to capture the shape virtually. After capturing the shape virtually, we used SolidWorks to develop a custom CAD model of a mold to be used on a hot press for manufacture of the propellers. We were able to successfully machine the mold design out of 6061 Aluminum on a 3 axis mill, however the design was not optimized for hot press use and the team delegated to make the propellers using a tool cast epoxy mold to ultimately create the propellers. We tested our propellers against the original industry standard EOLO propeller and found our forge propellers could produce slightly more thrust. A video of my summary of the project can be viewed below.


Junior Design Project sponsored by Norwalt and Omega Design
Automated Pill Bottle Filling and Capping Machine
In my Junior year at University of Delaware, I worked with a team of 10 students to design, prototype and test an automated system to load, fill, and cap a pill bottle autonomously. This project evolved over the course of 2 semesters, fall 2021 and spring 2022. My particular role was in designing and prototyping the mechanism for the screwing substation. My design featured a vertically constrained motor attached to a linear actuator in order to allow the mechanism to have vertical translation and rotation independently from each movement type so the two functions could be controlled and timed separately. In addition to the screwing mechanism, our complete final design featured a twin tube system to load the bottles onto the conveyor belt, a pill dropping mechanism using two alternating servo arms to load and drop pills out of a funnel, and a capper pickoff system to place the caps onto the bottles. Our design made extensive use of break-beam sensors, motors, and linear actuators. Working on this project evolved my electrical, Arduino, and prototyping skills dramatically. One of the key takeaways I learned was to plan wire management ahead of time and think of ways to minimize the use of multiple Arduino boards and wires to keep designs centralized and more easily controllable.


Extracurricular Personal Hobby
Ender 3 - 3D Printer at Home
Outside of academic pursuits, much of my time is still spent on engineering interests. One of these recent interests I have acted upon was to purchase and assemble a 3D printer so I could begin experimenting with 3D printing at home in my free time. After a few weeks of researching printers on the market that would fit my desired price point and would be a high quality printer that was also a good printer for a person's first 3D printer, I settled on purchasing a Creality Ender-3 in January of 2023. I am still exploring out how I would like to use it, but below are some of the items I have already printed!


Jointed octopus printed in one piece
One handed bottle opener

Hand Painted Baby Groot Figure
Toy rocket ship model